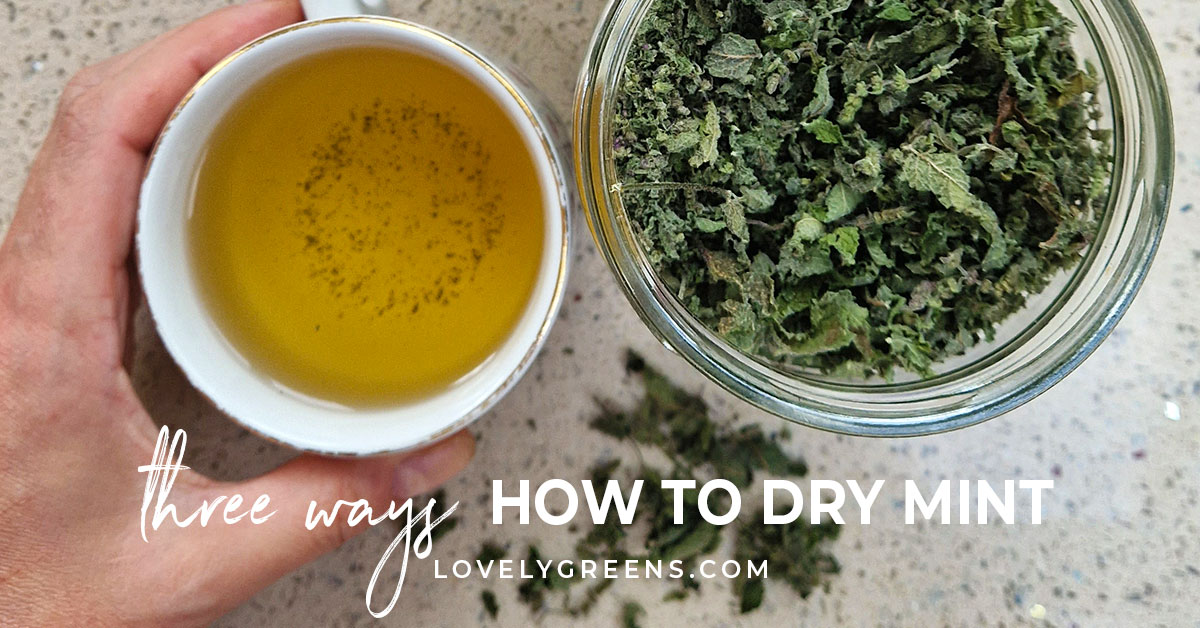
There’s nothing quite like the soothing aroma and refreshing taste of homemade mint tea. Whether you prefer it hot on a chilly evening or iced on a sweltering afternoon, a mug of mint tea is a delightful treat. For those who grow mint, you know it’s one of the easiest and most prolific herbs in the garden, often threatening to take over! This abundance makes it a prime candidate for drying, allowing you to enjoy its invigorating flavor all year long. If you’ve ever wondered how to dry mint for tea leaves effectively, you’re in the right place. We’ll explore several methods, with a special focus on the incredibly simple and hands-off paper bag technique, ensuring you have a steady supply of this beloved herb.
Why Dry Your Own Mint for Tea?
Beyond the sheer pleasure of a delicious cuppa, drying your own mint offers a myriad of benefits. First, mint is notoriously easy to grow. Even a small plant in a pot can yield a significant harvest, and garden beds often see it thrive with minimal effort. This means you can cultivate a virtually endless supply without relying on store-bought options that might be expensive or treated with chemicals. By drying your own, you maintain complete control over the quality, ensuring your tea is pure, organic, and packed with natural goodness.
Drying mint also allows you to preserve its peak flavor and aroma. Fresh mint is wonderful, but its shelf life is limited. Drying halts the degradation process, locking in those volatile oils that give mint its distinctive character. Imagine reaching into your pantry in the dead of winter and pulling out a jar of sun-kissed, fragrant mint leaves – it’s a taste of summer preserved. It’s also incredibly cost-effective, turning a garden hobby into a year-round pantry staple. For a deeper dive into harvesting techniques and why homegrown mint is superior, check out our guide on Harvest & Dry Mint: Enjoy Refreshing Homemade Tea All Year.
Prepping Your Fresh Mint for Drying Success
Before you embark on the drying journey, a little preparation goes a long way in ensuring your mint leaves retain their vibrant flavor and prevent any issues during the drying process.
Harvesting Your Mint
The best time to harvest mint for drying is in the morning, after the dew has evaporated but before the sun gets too hot. This is when the essential oils are most concentrated. You can snip entire stems, cutting just above a leaf node to encourage bushier growth. Don't be shy; regular harvesting actually makes the plant more robust! Look for healthy, vibrant leaves free from blemishes or pests.
Washing or Not Washing?
This is a common question. If you’re harvesting mint from your own garden and haven’t used any pesticides or chemicals, washing is often unnecessary. A quick visual inspection to ensure there are no dusty patches or tiny critters might be all you need. However, if you've purchased mint from a grocery store or a farmer's market, or if your garden mint is particularly dusty, it's a good idea to rinse it. Gently swish the mint in a bowl of cool water, then lay it out on clean paper towels or a kitchen towel. This step is crucial: ensure your mint is absolutely, thoroughly dry before proceeding to any drying method. Any lingering moisture can lead to mold and ruin your entire batch. A salad spinner can also be a fantastic tool to speed up the drying process after rinsing.
The Effortless Paper Bag Method: Your Ultimate Guide to Drying Mint
When it comes to learning how to dry mint for tea leaves, the paper bag method stands out for its simplicity, efficiency, and lack of special equipment. It's truly a 'set it and forget it' technique that yields excellent results, making it my personal go-to.
What You'll Need
- Freshly harvested mint (thoroughly dry if washed)
- A large paper bag (like a grocery bag)
- Scissors or garden shears
- String or thin rope (optional, for hanging)
- A hole punch (optional)
Step-by-Step Instructions
- Harvesting & Bagging: Head out to your mint patch with your paper bag. Snip whole stems of mint. You can either pick the individual leaves off the stems or dry the entire stalk – both methods work perfectly. If you dry the stems, the leaves will be easy to crumble off once dry, leaving the woody stems behind. Place the mint directly into the paper bag as you harvest.
- Ensuring Proper Airflow: This is a key step to prevent mold. Do not overfill your bag! It should be no more than 1/2 to 3/4 full, allowing plenty of space for air to circulate around the mint. This ample airflow is critical for even and thorough drying.
- Finding the Perfect Drying Spot: Once your bag is filled with mint (remembering the airflow rule), gently fold the top over to close it. The ideal location for drying is a dark, cool, dry place. Think a pantry, a quiet closet, or a basement. Direct sunlight can bleach the leaves, causing them to lose color and flavor-preserving essential oils. Humidity is the enemy, so avoid bathrooms or kitchens where moisture levels fluctuate. If you wish to hang the bag, punch a few holes near the top, thread some string through, and hang it. Otherwise, simply place it on a shelf.
- Checking for Dryness: Patience is a virtue here, though not much effort is required! After about a week, gently open the bag and check your mint. The leaves should be brittle, crumbly, and completely dry to the touch. They'll rustle like autumn leaves. If they still feel pliable or have any give, leave them for another few days or a week. The beauty of this method is that leaving them a bit longer won't harm them.
- Crushing & Storing: Once fully dry, simply remove the mint from the bag. If you dried whole stems, gently run your hands along them to release the crumbly leaves. The stems won't crumble like the leaves and are easy to pick out. Crush the dried leaves lightly with your hands or, for a finer texture, gently between your fingers. Store your dried mint in an airtight glass jar or container, away from direct sunlight, in a cool, dark place. This preserves its potency and flavor for up to a year or even longer.
Beyond the Bag: Other Popular Mint Drying Techniques
While the paper bag method is our top pick for its simplicity and effectiveness, especially when learning how to dry mint for tea leaves, there are other methods you might consider, depending on your resources and preferences.
- Air Drying in Bundles: This classic method involves gathering small bunches of mint stems, tying them with string, and hanging them upside down in a well-ventilated, dark, and dry room. It's aesthetically pleasing and works well for smaller quantities. Just ensure good air circulation to prevent mold.
- Oven Drying: For those seeking a faster method, an oven can be used. Spread a single layer of mint leaves on a baking sheet lined with parchment paper. Dry at the lowest possible temperature (usually 150-170°F or 65-75°C) with the oven door slightly ajar to allow moisture to escape. This method requires careful monitoring to prevent scorching, usually taking 1-2 hours.
- Food Dehydrator: A food dehydrator offers precise temperature control and excellent airflow, making it a highly efficient option. Spread mint leaves in a single layer on the dehydrator trays and set the temperature to a low setting (around 95-105°F or 35-40°C). Drying time can range from a few hours to a day, depending on humidity and leaf thickness.
While the paper bag method is our top pick for its simplicity, there are other effective ways to preserve your mint. Explore additional options in our comprehensive article: How to Dry Mint Leaves for Tea: 4 Simple & Effective Methods.
Storing Your Home-Dried Mint for Optimal Freshness
Proper storage is just as vital as proper drying to ensure your hard work doesn't go to waste. Once your mint leaves are completely dry and crumbly, transfer them to an airtight container. Glass jars with tight-fitting lids are ideal, as they don't impart any flavors and provide a good seal. Label your jars with the date of drying. Store these containers in a cool, dark pantry or cupboard, away from heat and light, which can degrade the mint's flavor and aroma over time. Stored correctly, dried mint leaves can retain their potency for at least one year, often longer, providing you with refreshing tea whenever the mood strikes.
Sip and Savor: Enjoying Your Homemade Mint Tea
Once you have your beautifully dried mint, making a cup of tea is delightfully simple. For a single serving, place about one teaspoon of crushed dried mint leaves into a tea infuser or directly into your mug. Pour 8-10 ounces of freshly boiled water over the leaves. Allow it to steep for 5-10 minutes, depending on your preferred strength. For a more intense flavor, you can steep it longer. Strain the leaves if necessary, and enjoy your homegrown, homemade mint tea. Add a slice of lemon, a drizzle of honey, or a fresh mint sprig for an extra touch of flavor.
Drying mint for tea is an incredibly rewarding process, connecting you to your garden and providing a delicious, healthy beverage all year round. The paper bag method, in particular, removes any complexity, proving that preserving herbs can be genuinely effortless. So go ahead, harvest that abundant mint, embrace the drying process, and prepare to enjoy the unparalleled taste of your very own homemade mint tea.
