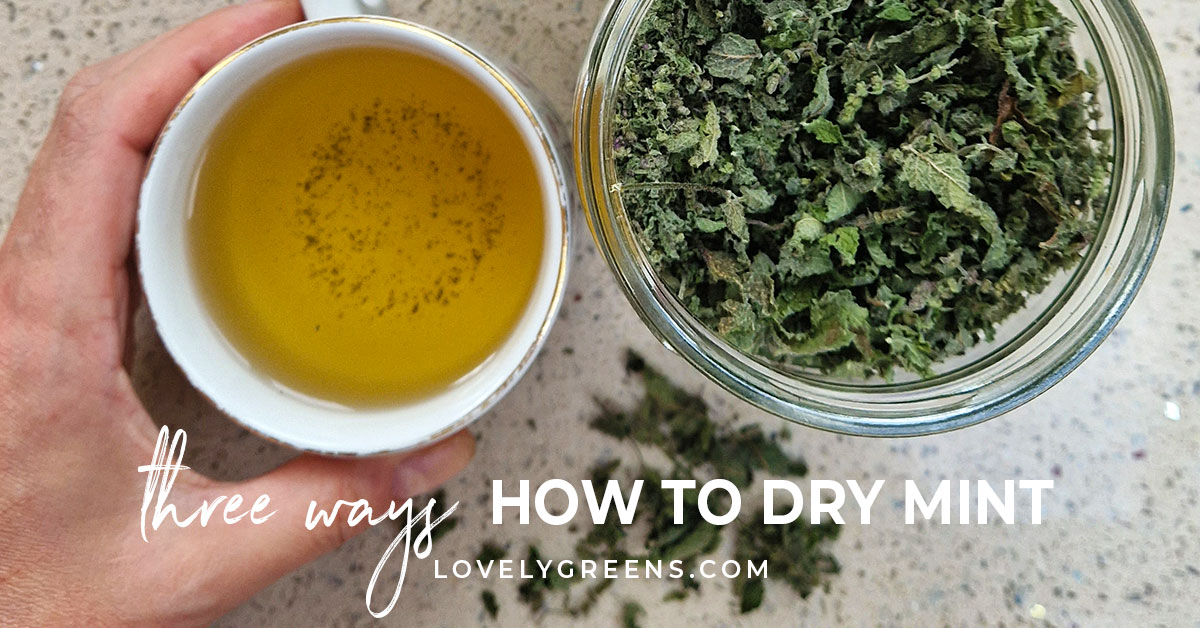
How to Dry Mint Leaves for Tea: Unlock Year-Round Refreshment
There's something uniquely invigorating about a cup of mint tea, whether it's steaming hot on a chilly morning or refreshingly iced on a summer afternoon. Mint, with its vibrant flavor and delightful aroma, is a beloved herb that's incredibly easy to grow and even easier to prepare for long-term enjoyment. If you're wondering
how to dry mint for tea leaves to capture that fresh taste all year long, you're in the right place. This comprehensive guide will walk you through four simple yet highly effective methods to dry mint leaves, ensuring you always have a bountiful supply for your next soothing brew.
Mint is a true garden marvel – a prolific grower that, with just a little encouragement, can provide an abundance of fragrant leaves. Its vigorous nature means that harvesting regularly not only gives you a continuous supply for drying but also encourages the plant to become bushier and more productive. Learning
how to dry mint for tea leaves is a fantastic way to harness this natural bounty and transform your garden's overflow into a pantry staple.
Why Dry Mint Leaves for Tea? The Benefits of Homemade Herbal Infusions
Beyond the sheer pleasure of a delicious cup, drying your own mint for tea offers several compelling advantages:
*
Year-Round Enjoyment: Fresh mint is seasonal, but dried mint allows you to savor its invigorating flavor regardless of the weather outside.
*
Cost-Effective: If you grow your own mint, drying it is virtually free, saving you money on store-bought herbal teas.
*
Natural & Pure: By drying your own mint, you control the process from start to finish, ensuring your tea is free from unwanted additives or pesticides (especially if you grow it organically).
*
Simple Preservation: Mint is one of the easiest herbs to dry, making it a perfect starting point for anyone new to herbal preservation.
The process of learning
how to dry mint for tea leaves is straightforward, often requiring no special equipment. With a little preparation and patience, you'll be well on your way to enjoying homegrown goodness throughout every season.
Pre-Drying Prep: Harvesting & Cleaning Your Mint
Before you dive into drying, a little preparation goes a long way in ensuring your mint leaves are perfectly preserved.
1. Harvesting Your Mint
For the best flavor and potency, harvest mint in the late morning after the dew has evaporated but before the intense midday sun. Aim for healthy, vibrant stems with no signs of wilting or damage. Cutting stems about 4-6 inches above the ground not only gives you plenty of leaves but also encourages the plant to put out new growth, ensuring a continuous harvest. Don't be shy; mint thrives on being trimmed!
2. To Wash or Not to Wash?
This is a common question when preparing herbs for drying.
*
Homegrown Mint: If your mint comes from your own garden and hasn't been sprayed with chemicals, washing is often unnecessary. A gentle shake to dislodge any loose soil or insects is usually sufficient.
*
Store-Bought Mint: If you've purchased mint from a grocery store or a farmer and aren't sure of its history, it's a good idea to rinse it. Gently wash the sprigs under cool running water.
3. The Golden Rule: Thoroughly Dry Before Drying!
This step is critical, especially if you've washed your mint. Any residual moisture can lead to mold during the drying process, ruining your batch. Lay the mint sprigs on a clean kitchen towel or paper towels and gently pat them dry. For larger batches or to speed things up, a salad spinner works wonders. Ensure there are absolutely no visible water droplets before moving to the next stage.
Now, let's explore the four simple and effective methods for
how to dry mint for tea leaves.
Method 1: The Effortless Air-Drying Paper Bag Method (Our Top Pick!)
This is, hands down, one of the easiest and most hands-off methods for drying mint, perfect for processing large quantities without any specialized tools. It’s my personal go-to for its simplicity and effectiveness. If you're looking for an excellent starting point, this is it! For more detailed insights into this method, you can also explore
Easy Ways to Dry Mint for Tea: The Paper Bag Method & More.
What You'll Need:
* Large paper bags (like grocery bags)
* Scissors (for punching holes and harvesting)
* Optional: String or twine for hanging
Step-by-Step Guide:
1.
Harvest & Prepare: Gather your fresh mint. You can either pick individual leaves off the stems or dry the whole stalks – the stems are easily removed once dry. Ensure any excess moisture is completely gone if you've washed your mint.
2.
Fill the Bag: Place the prepared mint leaves or stalks loosely into a paper bag. It’s crucial not to overfill the bag; it should be no more than 1/2 to 3/4 full to allow for adequate air circulation.
3.
Create Airflow: Fold the top of the bag over to close it. For even better airflow, you can punch a few small holes in the upper part of the bag.
4.
Hang in a Dark, Dry Place: Thread a piece of string through the holes at the top of the bag and hang it in a cool, dark, and dry location. A pantry, closet, or even a dry basement corner works perfectly. Direct sunlight can cause the leaves to lose their vibrant color and some of their volatile oils, diminishing their flavor.
5.
Check for Dryness: After about one week, check your mint. The leaves should feel brittle and crumble easily when touched. If they still feel pliable, give them another few days or a week. This method is very forgiving, so a few extra days won't hurt.
6.
Crumble & Store: Once thoroughly dry, gently crumble the leaves with your hands directly into an airtight container. If you dried whole stalks, the dried leaves will easily separate from the brittle stems at this point.
Method 2: Traditional Air Drying (Bundles)
This classic method is not only effective but also adds a rustic charm to your kitchen or pantry as your mint dries.
What You'll Need:
* Fresh mint sprigs
* Rubber bands, twine, or string
* Optional: Paper bag or mesh bag for dust protection
Step-by-Step Guide:
1.
Prepare Sprigs: Gently remove any lower leaves that might touch each other or become overly crowded.
2.
Form Bundles: Gather 5-10 mint sprigs into small bundles. The key is to keep the bundles small enough so air can circulate freely between the leaves.
3.
Secure Bundles: Use a rubber band, string, or twine to tie the stems together securely. A rubber band is often preferred as it will tighten as the stems shrink during drying.
4.
Hang to Dry: Hang the bundles upside down in a warm, dark, and well-ventilated area. Again, avoid direct sunlight. For extra protection against dust, you can loosely place a paper bag (with holes punched in it) or a mesh bag over the bundles.
5.
Monitor & Test: Allow 1-3 weeks for drying, depending on humidity and bundle size. The leaves are ready when they are crisp and crumble easily.
6.
Store: Once dry, remove the leaves from the stems and store them in an airtight container.
Method 3: Quick & Convenient Oven Drying
When time is of the essence, your oven can be a handy tool for drying mint leaves, though it requires a bit more vigilance.
What You'll Need:
* Fresh mint leaves (removed from stems)
* Baking sheets
* Parchment paper (optional, but recommended)
Step-by-Step Guide:
1.
Preheat Oven to Lowest Setting: The ideal temperature is usually around 150-170°F (65-77°C), or even just the pilot light if your oven has one and maintains a consistent low temperature. If your oven doesn't go this low, you can turn it on for 10-15 minutes, then turn it off and allow the residual heat to dry the mint.
2.
Arrange Leaves: Spread the individual mint leaves in a single layer on baking sheets. For easier cleanup and to prevent sticking, line the sheets with parchment paper. Overcrowding will prolong drying time and can lead to uneven drying.
3.
Dry in Oven: Place the baking sheets in the preheated oven. Leave the oven door slightly ajar to allow moisture to escape.
4.
Monitor Closely: Dry for 1-2 hours, checking every 15-30 minutes. Gently toss or turn the leaves periodically to ensure even drying. Be very careful not to scorch the leaves, as this will destroy their flavor and potency.
5.
Test for Dryness: The leaves are ready when they are crispy and crumble easily. Remove from the oven immediately.
6.
Cool & Store: Allow the dried leaves to cool completely on the baking sheets before crumbling them and transferring them to an airtight container.
Method 4: The Efficient Food Dehydrator Method
For those with a food dehydrator, this method offers precise control and consistent results, making it an excellent choice for larger harvests.
What You'll Need:
* Fresh mint leaves (removed from stems)
* Food dehydrator
Step-by-Step Guide:
1.
Prepare Leaves: Remove mint leaves from their stems and ensure they are clean and completely dry.
2.
Arrange on Trays: Spread the mint leaves in a single layer on your dehydrator trays, making sure not to overlap them too much to allow for optimal airflow.
3.
Set Dehydrator: Set your dehydrator to a low temperature, typically around 95-105°F (35-40°C). This low setting helps preserve the mint's delicate essential oils.
4.
Dehydrate: Dehydrate for 2-4 hours, or until the leaves are brittle and easily crumble. Drying time can vary depending on the thickness of the leaves and your dehydrator model.
5.
Check Periodically: Rotate trays if your dehydrator doesn't have even heat distribution and check the leaves frequently for dryness.
6.
Cool & Store: Once fully dry, remove the leaves and let them cool completely before storing them in an airtight container.
Storing Your Dried Mint Leaves for Long-Lasting Flavor
Proper storage is key to maintaining the quality and potency of your homemade dried mint. Once your mint leaves are thoroughly dry:
*
Airtight is Essential: Store the crumbled leaves in an airtight glass jar or container. This prevents moisture from re-entering and keeps out air, which can degrade the flavor.
*
Dark & Cool: Keep the containers in a cool, dark place, away from direct sunlight and heat. A pantry or cupboard is ideal. Exposure to light and heat can cause the leaves to lose their color, aroma, and medicinal properties.
*
Label & Date: Always label your containers with the herb and the date it was dried. Dried mint typically retains its best flavor for about 6-12 months, though it can remain safe to use for longer. You'll know it's past its prime if the aroma has significantly faded.
Enjoying Your Homemade Mint Tea
Now that you know
how to dry mint for tea leaves, it’s time to enjoy the fruits of your labor!
To brew a delicious cup of mint tea:
* Use about 1 teaspoon of dried mint leaves per 8 ounces of hot water.
* Steep for 5-10 minutes, depending on your desired strength.
* Strain the leaves and enjoy!
Dried mint is incredibly versatile. It makes a fantastic hot infusion on its own, but it also shines as an iced tea, or even blended with other herbs like chamomile or green tea for a unique flavor profile. Harvesting and drying your own mint is a rewarding process that connects you more deeply with nature's bounty. To learn more about maximizing your mint harvest, check out
Harvest & Dry Mint: Enjoy Refreshing Homemade Tea All Year.
Conclusion
Drying mint leaves for tea is a remarkably simple and satisfying endeavor that empowers you to enjoy the refreshing taste of mint all year long. Whether you choose the hands-off paper bag method, the traditional bundle drying, the quick oven technique, or the efficient dehydrator, you'll find that preserving this aromatic herb is well within reach. So, go ahead, harvest your mint, pick your preferred drying method, and soon you'll be sipping on your very own, perfectly preserved homemade mint tea – a true taste of summer, anytime you desire.