Harvest & Dry Mint: Enjoy Refreshing Homemade Tea All Year
Imagine sipping on a fragrant, vibrant cup of mint tea on a chilly winter evening, or enjoying a cool, invigorating glass of iced mint tea on a sweltering summer afternoon. The secret to this year-round pleasure? Learning
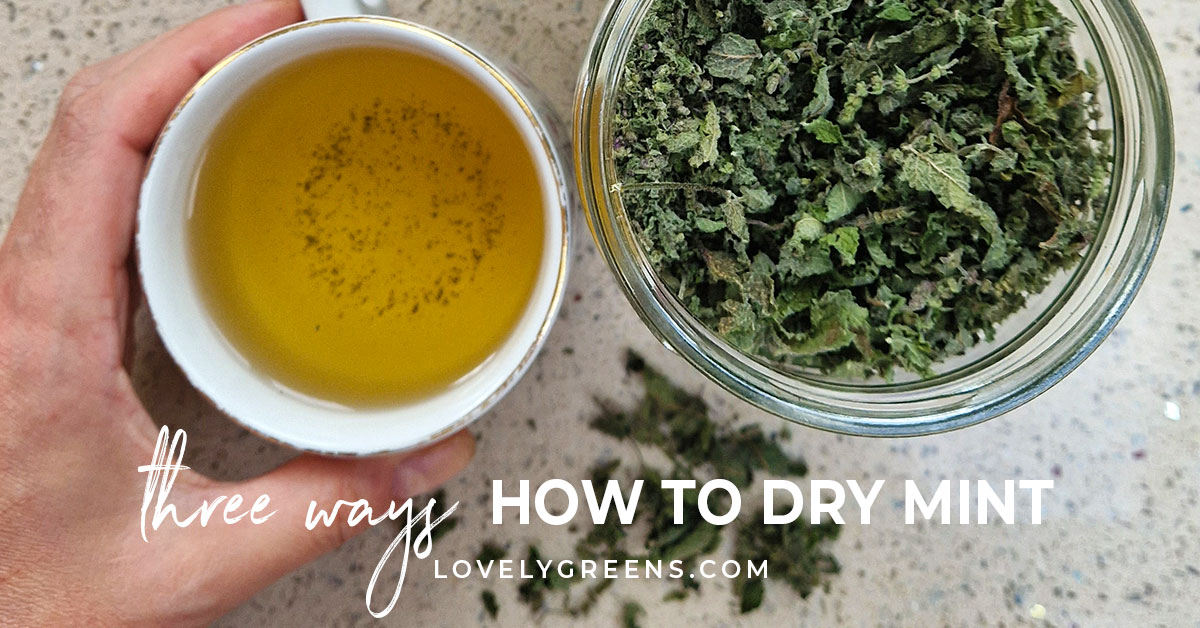
how to dry mint for tea leaves yourself! Mint is a marvelously easy herb to cultivate, growing with an almost unstoppable enthusiasm, making it a prime candidate for home harvesting and preservation. Not only is drying your own mint incredibly simple, but it also ensures you have a readily available supply of this delicious, refreshing herb, free from additives and bursting with natural flavor. If the idea of creating your own custom tea blend from garden to cup excites you, read on to discover the straightforward methods to preserve this aromatic treasure.
Why Dry Your Own Mint for Tea? A World of Flavor and Freshness
Mint isn't just a tea ingredient; it's an experience. Its crisp, invigorating flavor and soothing aroma make it a favorite for many. But why go through the effort of
drying mint leaves when you can buy pre-packaged tea? The answer lies in unparalleled freshness, control, and a deep connection to what you consume.
Firstly, homegrown mint, especially when dried correctly, retains a much more potent and authentic flavor profile than many store-bought alternatives. You're capturing the essence of the plant at its peak. Secondly, mint is incredibly easy to grow. Seriously, if you have a patch of garden or even a few pots, you can grow more than enough to sustain a year-round tea habit. Its prolific nature means regular harvesting is not only possible but encouraged, as it prompts the plant to grow bushier and produce even more fragrant leaves.
Drying your own mint also gives you complete control over the process, ensuring no unwanted chemicals or preservatives are involved. It's a sustainable, cost-effective way to enjoy a high-quality herbal tea, anytime you desire it. Whether you prefer your mint tea hot to soothe a sore throat or aid digestion, or iced for a rejuvenating pick-me-up, having a jar of your own dried mint on hand elevates the experience.
Preparing Your Mint for Drying: From Harvest to Readiness
Before you embark on the drying journey, a little preparation goes a long way in ensuring the best results for your homemade mint tea.
Harvesting Your Mint
The ideal time to harvest mint is in the morning after the dew has dried, but before the heat of the day intensifies, as this is when the essential oils are most concentrated. You can harvest mint by cutting stems about 4-6 inches from the top, just above a leaf node. This encourages the plant to branch out and grow even more vigorously, providing you with a continuous supply. Don't be shy; mint thrives on being trimmed! Harvesting regularly also prevents the plant from flowering, which can sometimes diminish the leaf flavor.
To Wash or Not to Wash?
This is a common question, and the answer largely depends on your mint's source.
*
Homegrown & Unsprayed: If you've grown your mint organically without the use of pesticides or chemicals, and it looks clean, washing might not be necessary. A gentle shake to dislodge any potential garden guests should suffice.
*
Store-bought or Uncertain Source: If you've purchased mint from a grocery store or a farmer's market where you're unsure of its treatment, it’s always best to give it a quick rinse under cool water. This helps remove any dirt, dust, or potential residues.
Regardless of whether you wash it, *thorough drying is absolutely crucial* before you begin the actual drying process. Any residual moisture can lead to mold, ruining your batch. Lay the washed mint on a clean kitchen towel or paper towels, gently patting it dry. For larger batches, a salad spinner can significantly speed up this step. Ensure the leaves are completely dry to the touch before moving on.
Mastering the Art of Drying Mint: Easy Methods for Every Home
There are several effective ways to dry mint leaves for tea, each with its own advantages. While air drying remains a perennial favorite for its simplicity and hands-off nature, we'll explore the most popular options. For a more detailed breakdown of these techniques, including specific temperatures and times for oven and dehydrator drying, you might find our article
How to Dry Mint Leaves for Tea: 4 Simple & Effective Methods particularly helpful.
1. The Paper Bag Method: Effortless Air Drying
This is often hailed as the easiest and most preferred method, especially for larger batches, as it requires no special equipment beyond a paper bag and scissors. It’s ideal for beginners looking to learn
how to dry mint for tea leaves with minimal fuss.
*
Harvest & Prepare: As outlined above, snip your mint stems and ensure they are thoroughly dry if washed.
*
Fill the Bag: Grab a large paper grocery bag. You can either pick the individual leaves off the stems or dry the entire stalk – the stems are easy to remove once dried. Place the mint loosely into the bag, ensuring it's no more than half to three-quarters full. Adequate airflow is key to preventing mold.
*
Promote Airflow: To enhance air circulation, consider punching a few holes in the top section of the bag.
*
Seal & Hang: Fold the top of the bag over to close it. You can thread a string through the punched holes to hang it, or simply place it in a suitable location.
*
Location, Location, Location: Hang the bag in a cool, dark, dry place away from direct sunlight. A pantry, a dark closet, or a basement corner are excellent choices. Sunlight can degrade the mint's color and flavor.
*
Patience is a Virtue: Check your mint after about a week. The leaves should be brittle and crumbly to the touch. If they still feel pliable, leave them for another few days to a week. The beauty of this method is its forgiving nature – leaving it a bit longer won't harm the mint.
*
Crumble & Store: Once fully dry, simply crumble the leaves with your hands. If you dried whole stalks, the dried leaves will easily separate from the stems. Discard the stems, as they don't offer much flavor for tea.
2. Traditional Air Drying: Hanging Bundles
Another classic air-drying technique involves hanging bundles of mint.
*
Create Bundles: Gather small bunches of mint stems (5-10 stems per bundle) and tie them together securely with kitchen twine or rubber bands.
*
Hang Them Up: Hang these bundles upside down in a well-ventilated, dark, and dry area. Again, direct sunlight is to be avoided.
*
Drying Time: This method typically takes 1-3 weeks, depending on humidity and bundle size. The mint is ready when the leaves are crisp.
3. Using a Food Dehydrator
For those with a food dehydrator, this method offers a more controlled and often quicker drying process.
*
Arrange Leaves: Lay mint leaves (or small pieces of stems) in a single layer on the dehydrator trays, ensuring they don't overlap.
*
Set Temperature: Set the dehydrator to a low temperature, typically between 95-105°F (35-40°C).
*
Drying Time: Drying time can vary from 12-24 hours. Check the mint periodically. It's fully dry when the leaves are brittle and crumble easily.
4. Oven Drying (with caution)
While less ideal due to the risk of "cooking" the mint and losing essential oils, oven drying can be an option if other methods aren't feasible.
*
Prepare Trays: Spread mint leaves in a single layer on baking sheets.
*
Lowest Temperature: Set your oven to its absolute lowest temperature, ideally around 150-170°F (65-75°C). Prop the oven door slightly ajar with a wooden spoon to allow moisture to escape.
*
Monitor Closely: This method requires constant vigilance. Check the mint every 15-20 minutes, flipping the leaves occasionally. It can take 1-3 hours. Remove immediately once the leaves are crisp.
For further insights into the pros and cons of these different drying approaches and to discover the simple yet effective methods for perfect preservation, be sure to check out our comprehensive guide:
Easy Ways to Dry Mint for Tea: The Paper Bag Method & More.
Storing Your Dried Mint for Long-Lasting Freshness
Proper storage is just as important as proper drying to ensure your mint tea leaves retain their potency and flavor. Once your mint is thoroughly dry and crumbled, transfer it to an
airtight container. Glass jars with tight-fitting lids are excellent choices, as they prevent moisture and air from reaching the leaves.
Store the sealed containers in a cool, dark, dry pantry or cupboard. Exposure to light, heat, or humidity can degrade the mint's flavor and aroma over time. Properly stored dried mint can maintain its quality for 6-12 months, sometimes even longer. It’s a good practice to label your jars with the drying date so you can keep track of freshness.
Brewing the Perfect Cup of Homemade Mint Tea
Now for the best part – enjoying the fruits of your labor! Brewing a cup of tea from your homemade dried mint is wonderfully simple.
For Hot Mint Tea:
1. Place about 1-2 teaspoons of your dried mint leaves into a tea infuser, tea ball, or directly into your mug. Adjust the quantity to your preferred strength.
2. Pour 8 ounces (about 1 cup) of freshly boiled water over the mint.
3. Steep for 5-10 minutes. For a stronger flavor, steep longer.
4. Remove the infuser or strain the leaves.
5. Sweeten with honey or add a slice of lemon if desired. Savor the refreshing aroma and taste!
For Iced Mint Tea:
1. Brew a stronger concentrate by using 3-4 teaspoons of dried mint per cup of boiling water. Steep for 10-15 minutes.
2. Strain the mint leaves and let the concentrate cool to room temperature.
3. Pour the cooled concentrate over ice in a tall glass.
4. Top with cold water or sparkling water to dilute to your taste.
5. Garnish with fresh mint sprigs, lemon slices, or a touch of sweetener.
Conclusion
Learning
how to dry mint for tea leaves is a rewarding skill that brings the refreshing taste of your garden into your home all year long. From the effortless paper bag method to the more controlled dehydrator, preserving this versatile herb is surprisingly straightforward. By following these simple steps for harvesting, drying, and storing, you’ll unlock a continuous supply of aromatic, flavorful mint, ready to be brewed into a soothing hot cuppa or a revitalizing iced beverage. Embrace the joy of homemade tea and enjoy the natural, invigorating goodness of mint, fresh from your efforts, whenever you desire.